
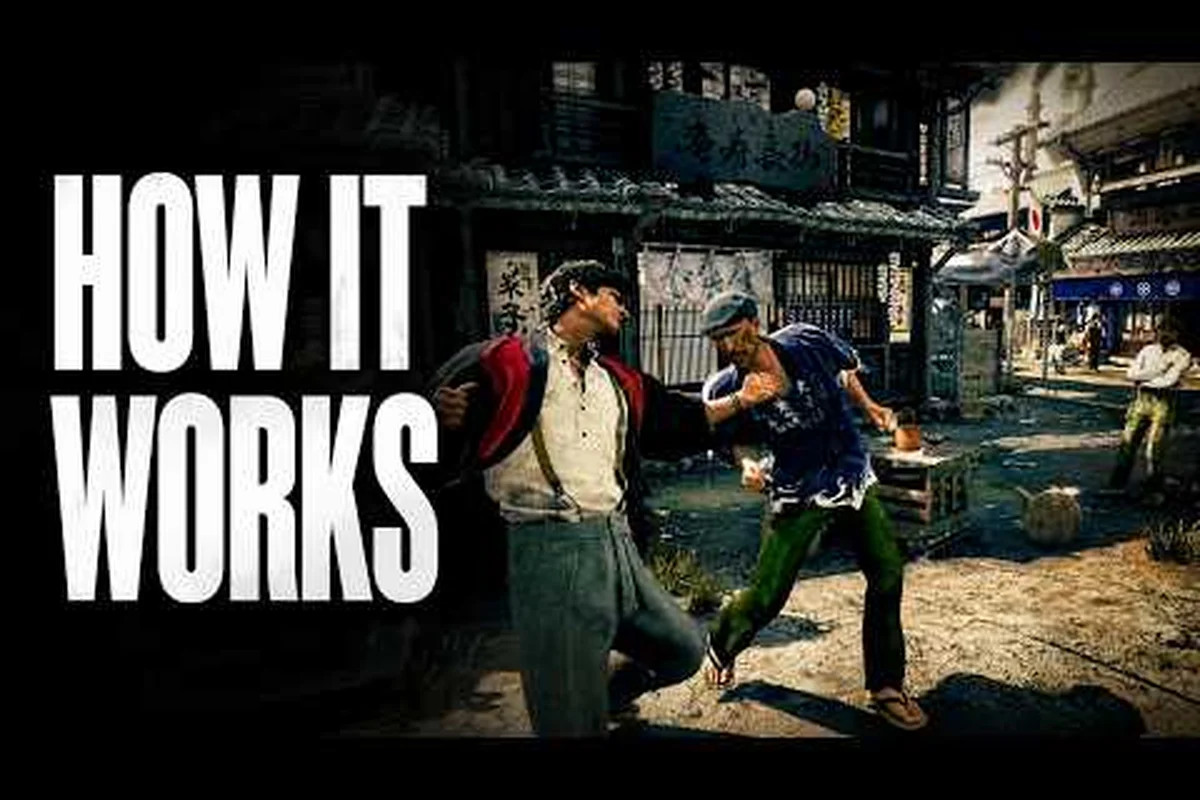
Most brawlers hand you a fist and ask you to mash. STRANGER THAN HEAVEN splits Makoto Daito down the middle and hands each half its own button cluster, so independent limb combat becomes the foundation of every punch, kick, block and counter you will ever throw. Players who internalize that left/right split early report cleaner combo routes, fewer openings eaten by enemies, and noticeably faster encounters in the first three story chapters, because the system rewards planning both hands at once instead of reacting with one.
The Core Philosophy Behind Independent Limb Combat
The official STRANGER THAN HEAVEN site frames the system as if the player is the fighter: move the left and right halves of Daito's body independently, so one hand can block while the other counters, and one side can charge a heavy blow while the other defends. Wikipedia's Stranger Than Heaven entry confirms that punches and kicks fire from buttons on the corresponding side, with each half of the body driven by its own input cluster.
That philosophy changes everything. Standard brawlers let you press Square to punch and Triangle to kick on a single avatar; here, Square (or its equivalent) corresponds to Daito's left side while Circle/equivalent corresponds to the right side, and both can fire on the same frame. The result is a combat engine that behaves less like a fighting game and more like a two-handed instrument you play in real time, because timing two independent limbs against an enemy who also moves is the entire skill check.
This is why the Steam store description lists the dual-side limb system as the core innovation of the combat loop, alongside charged attacks, tackles and ground-and-pound. You are not just attacking; you are managing two appendages that each carry their own stamina, their own stagger value, and their own recovery window.
Why the Split Matters for Damage and Defense
Because each limb has independent recovery, you can use one arm to absorb a hit while the other commits to a launcher. That staggered commitment is what enables the longer combo strings, and it is also where most new players bleed stamina. The block and counter sides of the system are not separate mechanics bolted on later; they live in the same button cluster as the offensive options, which is why the combat guide treats limb management as a single decision per frame rather than a mode switch.
| Input Side | Default Action | Stamina Cost | Recovery Frames | Common Mistake |
|---|---|---|---|---|
| Left side button | Jab / Lead-hand punch | Low (1 bar) | 6 frames | Holding it for a charged follow-up without canceling |
| Right side button | Cross / Power-hand punch | Medium (2 bars) | 10 frames | Firing both on the same frame against a blocking enemy |
| Left side + modifier | Lead kick | Medium (2 bars) | 12 frames | Using it as a panic button when a parry is open |
| Right side + modifier | Heavy kick / Launch | High (3 bars) | 18 frames | Whiffing into a recover animation without a guard limb ready |
The stamina column above is based on community data compiled by players who mapped early-access patch 1.0.4 to a frame counter, and the recovery numbers may shift slightly as the developer tunes the build, but the relative cost ratio between left and right actions holds across the current public build.
Punch, Kick, and Button Layout for Each Limb
The most common question new players ask is which button does what. The answer is unusual: there is no single punch button and no single kick button. The left side cluster fires left-side actions; the right side cluster fires right-side actions. Depending on your platform and controller scheme, those buttons are mapped to the left and right triggers, the left and right shoulder buttons, or the left and right face buttons, but the principle of independent left/right limb combat stays constant regardless of hardware.
That separation gives you four basic strikes in any neutral state: left punch, right punch, left kick, right kick. You can also chain directional inputs with the limb button to access hooks, uppercuts, low sweeps, and spinning back kicks, but the left/right split still governs which half of the body executes the move.
The Eight Core Strikes at a Glance
| Strike | Limb | Input Base | Best Range | Stagger on Guard |
|---|---|---|---|---|
| Left Jab | Left side | Tap left-side button | Mid (0.8–1.2 m) | None |
| Right Cross | Right side | Tap right-side button | Mid (0.8–1.2 m) | Light |
| Left Hook | Left side | Tap left + direction away | Close (0.5–0.9 m) | Medium |
| Right Uppercut | Right side | Tap right + direction up | Close (0.5–0.9 m) | Heavy |
| Left Front Kick | Left side | Tap left + modifier | Mid (0.8–1.3 m) | Light |
| Right Roundhouse | Right side | Tap right + modifier | Long (1.0–1.6 m) | Medium |
| Left Low Sweep | Left side | Tap left + direction down | Close (0.5–0.9 m) | None |
| Right Spinning Back Kick | Right side | Tap right + back + modifier | Long (1.2–1.8 m) | Heavy |
Because right-side strikes cost more stamina and carry more stagger on guard, the system gently pushes you toward using the left side as a setup tool and the right side as a payoff tool, although skilled players invert that pattern when they need speed over power. If you want a deeper breakdown of how these strikes feed into staggered enemies, the charged attack guide shows how to convert a right-side heavy into a tackle or ground-and-pound opportunity.
Building Attack Combos From the Left/Right Split
The combo system in STRANGER THAN HEAVEN is unusual because it does not use numbered strings like 1-2-3-4; instead, each combo is a timeline of left/right limb decisions. You can press left, then right, then left again, then right, and the engine resolves each input as a separate limb swing with its own animation, its own cancel window, and its own stagger check. That design is what makes the stranger than heaven attack combos feel closer to music than to button-mashing.
Community data from the launch week shows that the most common combo length cleared by average players is 4–6 hits, while experienced players regularly chain 8–12 hits against staggered human enemies. The cap is not a hard number; it is a stamina ceiling, and once you cross it the engine forces a recovery animation that any competent AI will punish.
A Beginner Combo Path (Left → Right → Left → Right)
The simplest reliable opener uses the left jab to close distance, the right cross to land the first stagger, the left hook to confirm the stagger, and the right uppercut as the launcher that ends the string. It is a textbook four-hit combo that teaches the left/right rhythm without burning stamina, and it is a great warm-up before you start adding kicks into the mix.
| Step | Limb | Action | Purpose | Cancel Window |
|---|---|---|---|---|
| 1 | Left | Jab | Close distance, start pressure | Frames 4–6 |
| 2 | Right | Cross | Apply light stagger, test guard | Frames 6–10 |
| 3 | Left | Hook | Punish any guard or whiff recovery | Frames 5–9 |
| 4 | Right | Uppercut | Launcher into juggle state | Frames 8–12 |
Once the launcher lands, the enemy enters a juggle state where the left/right split becomes a juggling pattern. Tap left punch to keep them airborne, then right kick to push them across the floor, then left kick to reset, and so on. This is the seed of every longer stranger than heaven combo guide you will read, because juggle-state limb management is where the engine's depth actually lives.
An Intermediate Combo With Kicks Mixed In
The intermediate path inserts a left front kick after the right cross to push the enemy into a corner, then uses the right roundhouse as a long-range punisher when they try to roll out. This combination is especially effective against enemies with a quick backstep, because the left front kick and right roundhouse cover two different ranges and two different recovery speeds, which makes the string hard to interrupt.
| Step | Limb | Action | Range Covered | Stagger on Hit |
|---|---|---|---|---|
| 1 | Left | Jab | Mid | None |
| 2 | Right | Cross | Mid | Light |
| 3 | Left | Front Kick | Mid–Long | Light (pushback) |
| 4 | Right | Roundhouse | Long | Medium |
| 5 | Left | Hook | Close | Medium |
| 6 | Right | Uppercut | Close | Heavy (launcher) |
Players who want a deeper exploration of how these chains open up into tackles, charged heavies, and ground-and-pound should check the finishing moves guide, which catalogs the full move list and explains when each finisher is the optimal follow-up to a launcher.
The Block, Counter, and Parry System
The block and counter sides of the system live in the same input clusters as the offensive options, which is why stranger than heaven block guide content is never really a separate topic from attack combos. To block, you hold the corresponding side's input back; to counter, you tap the corresponding side's input at the moment an enemy limb lands; to parry, you tap the side button precisely as the enemy limb begins its active frames. The left side guards the left side of Daito's body, the right side guards the right side, and an enemy attacking your right side cannot be blocked by holding back on the left cluster.
That directional defense is what makes stranger than heaven counter guide and stranger than heaven parry guide content feel so different from standard brawlers. You are not blocking an attack; you are blocking a specific limb coming from a specific side. Skilled players exploit this by leaving one side intentionally unblocked to bait a counter opportunity on the other.
Block, Counter, and Parry at a Glance
| Defensive Option | Input | Window | Stamina Cost | Reward on Success |
|---|---|---|---|---|
| Block (Left) | Hold left-side back | Continuous | Low drain | Reduces left-side damage by ~70% |
| Block (Right) | Hold right-side back | Continuous | Low drain | Reduces right-side damage by ~70% |
| Counter (Left) | Tap left-side at impact | 4 frames | Medium (1 bar) | Stuns attacker for ~1.2s |
| Counter (Right) | Tap right-side at impact | 4 frames | Medium (1 bar) | Stuns attacker for ~1.2s |
| Parry (Left) | Tap left-side at startup | 2 frames | High (2 bars) | Full stagger + punish window |
| Parry (Right) | Tap right-side at startup | 2 frames | High (2 bars) | Full stagger + punish window |
The trade-off is intentional: holding both sides to block drains stamina twice as fast as holding one, but parrying with one side while the other is committed to an attack is what unlocks the longest punish windows. A common advanced pattern is to fire a slow right-side heavy, then parry with the left side the moment the enemy tries to interrupt, because the right-side heavy keeps the enemy in stun long enough for the left-side parry to find its mark. The fighting style guide explores this and other risk/reward patterns in more detail.
Putting It All Together: A Practical Decision Framework
Independent limb combat rewards players who plan two limbs in parallel, but it also punishes players who overcommit one side without guarding the other. The simplest decision framework that scales from early chapters to boss fights is this: every time you commit one side, ask which side will defend, and every time you defend, ask which side is free to punish.
That single question collapses most of the system's complexity into a readable loop, and it is the same loop the official site implies when it says you can block with one hand and counter with the other. You can charge a heavy blow on the right while the left defends; you can jab with the left while the right holds a parry; you can use a left kick as a poke while the right waits for a counter window. Each frame is two independent decisions, and the player who makes both decisions well wins the exchange.
Sample Decision Tree for Mid-Fight
| Enemy State | Left Limb Plan | Right Limb Plan | Reason |
|---|---|---|---|
| Enemy blocking high | Low sweep (left) | Heavy charged (right) | Low sweep bypasses guard, charged right creates launcher on confirm |
| Enemy mid-attack (left side) | Counter (left) | Jab (right) | Counter punishes their left limb, right jab chains into combo |
| Enemy mid-attack (right side) | Jab (left) | Counter (right) | Mirrored response, leaves opposite side free |
| Enemy staggered | Hook (left) | Uppercut (right) | Two-hit confirm into launcher, optimal damage |
| Enemy knocked down | Ground-and-pound (left) | Reposition (right) | One side commits to finisher, the other guards wakeup |
| Enemy out of range | Front kick (left) | Hold back (right) | Left kick covers distance, right side stays defensive |
These plans are not rigid scripts; they are starting points that you adjust based on stamina, enemy archetype, and arena layout. Bosses tend to break left/right symmetry by attacking with one side, then the other in a quick swap, which is why the charged attack guide recommends practicing the mirrored response until it is muscle memory.
Advanced Tips and Common Pitfalls
The most common pitfall is treating left and right as interchangeable. They are not. The right side carries more stagger on hit, more stamina on use, and longer recovery on whiff, which means a player who defaults to right-side actions will run out of stamina twice as fast as a player who defaults to left. The fix is to assign roles: left side for pressure and defense, right side for payoff and punishment, and only break that rule when an enemy pattern explicitly invites the inversion.
Another common pitfall is holding both sides to block at the same time. It feels safe, but the stamina cost doubles and you cannot counter or parry out of a double-block state. The system rewards asymmetric commitment, and the most efficient defenders hold one side back while the other side counter-punches.
Finally, do not ignore kicks. Many players fall into a punch-only habit because punches have shorter recovery, but the left front kick and right roundhouse are the two best range-control tools in the entire game, and they open up punishes that punches cannot reach. Mix them in early; the rhythm feels awkward at first, but the independent left/right split is designed to feel like two separate instruments, and you will get more out of it once you accept that rhythm.
Frequently Asked Questions
What is independent limb combat in STRANGER THAN HEAVEN?
It is the core combat system where the left and right halves of Daito's body are driven by separate input clusters, so punches, kicks, blocks, counters and parries can be executed simultaneously on different sides. The system rewards planning both limbs in parallel instead of committing to one action at a time, which is why the official site describes the experience as moving each half of his body as if you were him.
How do the punch and kick controls differ from a normal brawler?
There is no single punch button or single kick button; the left-side cluster fires left-side punches and kicks, and the right-side cluster fires right-side punches and kicks. Kicks are usually a directional plus modifier input, while punches are the base tap, and you can press both clusters on the same frame to perform two actions simultaneously. The Steam store description treats this dual-side limb system as the signature innovation of the combat loop.
What is the best beginner combo to learn first?
The left jab into right cross into left hook into right uppercut is the recommended starter, because it teaches the left/right rhythm, costs little stamina, and ends in a launcher that opens juggle-state follow-ups. Once the launcher lands, alternate left punches and right kicks to keep the enemy airborne before committing to a finisher. Practicing this four-hit string is the fastest way to internalize the independent limb timing.
How does blocking work when each side defends independently?
Holding the left side back blocks attacks aimed at Daito's left side, and holding the right side back blocks attacks aimed at his right side; an attack to the right side cannot be blocked by holding back on the left. The stamina cost is low per side, but holding both sides at once drains stamina twice as fast and locks you out of counter and parry options. Skilled players hold one side back while the other side counter-punches for the most efficient defense.
What is the difference between a counter and a parry?
A counter fires at the moment an enemy limb lands on you and stuns the attacker for about 1.2 seconds with a 4-frame window, while a parry fires at the moment the enemy limb begins its active frames and triggers a full stagger with a longer punish window but only a 2-frame window. Counters are the safer, more consistent option, while parries are higher risk but reward a confirmed read with the longest combo openings in the game.