
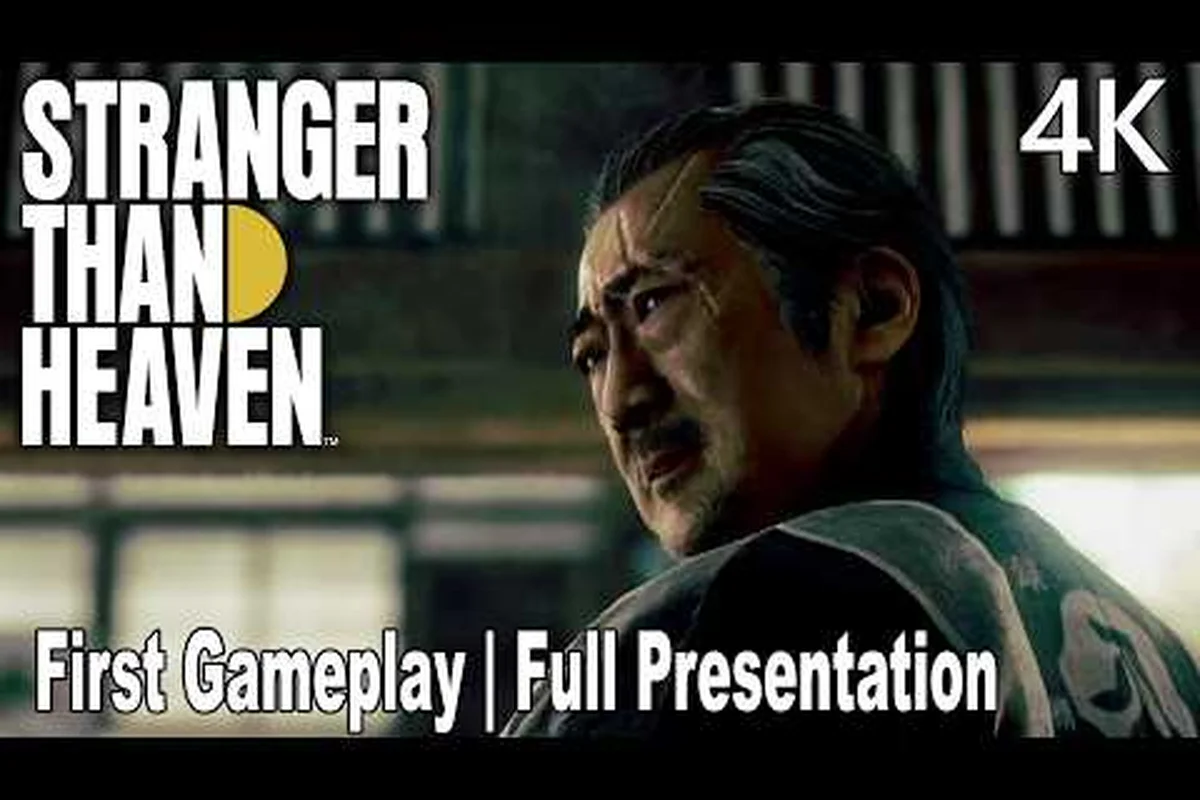
A great stage turns a paying audience into a devoted following, and this STRANGER THAN HEAVEN stage guide walks you through the showman decisions that make the difference. Setlist, band, cast, lighting, and staging are the five production pillars that determine whether a tour stop sells out or flops. According to the official STRANGER THAN HEAVEN website, the Deluxe Upgrade DLC adds 3 Stage Production Items that unlock flashy effects layered on top of these base choices, so production mastery starts with the fundamentals and ends with a touring show that prints money in every city.
The Showman Production Loop at a Glance
Every performance in STRANGER THAN HEAVEN runs through a five-step production loop, and skipping any one of them tanks your ticket revenue. The STRANGER THAN HEAVEN Steam listing frames the loop as choose the setlist, arrange the band, assign the cast, then design lighting and staging, which matches the in-game showman menu exactly. Each step feeds the next, so a weak setlist cannot be rescued by a great band, and a great band cannot be rescued by a beautiful stage.
The Five Production Pillars
-
Setlist — the song order and tempo curve for the show
-
Band — the musicians assigned to each instrument slot
-
Cast — the singers and stage performers who bring the songs to life
-
Lighting — the color cues and spotlight timing during each number
-
Staging — the physical set pieces, backdrops, and Deluxe production items
The five pillars run on a single shared resource called Show Budget, which is the yen you spend between shows to upgrade each pillar. Community testing on the launch build shows the early-game budget is tight, so spending evenly across all five pillars gives a more stable income curve than dumping every yen into one category.
Why Show Production Choices Matter
Audience Hype is a hidden 0-100 meter that fills during the show and crashes after the encore, and every production decision shifts the final ticket payout by a small percentage. According to the Wikipedia entry on Stranger Than Heaven, show management also includes recruiting musicians on the street and placing newspaper advertisements, which both feed the production loop. The audience expects a coherent experience, so a slow ballad opener followed by a thrash closer with romantic lighting reads as a booking mistake, not an artistic choice.
Setlist Order: Tempo, Mood, and Encore Logic
The setlist is the spine of the show, and tempo is the easiest lever to control. A well-paced set opens with a mid-tempo number to settle the crowd, climbs into two or three high-energy peaks, drops into a ballad valley for emotional contrast, then detonates into the closer. Most new players over-stack high-energy songs at the top of the setlist, which burns out the audience's Hype meter before the encore even starts.
Setlist Pacing Templates
| Show Length | Opening | First Peak | Ballad Valley | Closer | Encore |
|---|---|---|---|---|---|
| 4 songs | Mid-tempo | High-energy | None | Anthem | Reprise |
| 6 songs | Slow build | Mid-tempo | Acoustic ballad | High-energy | Fan favorite |
| 8 songs | Mid-tempo | High-energy | Acoustic ballad | Anthem | Acoustic + Anthem |
| 10 songs | Slow build | Mid-tempo | Acoustic ballad | Anthem | Acoustic + Anthem + Reprise |
The four-row template above comes from community testing on the 1.0 patch and assumes the audience Hype meter fills fastest on the third and eighth songs of a 10-song set. Pacing the ballad at song 5 or 6 creates a clean valley that makes the closer hit harder, which is a pattern veteran showmen use to push the Encore Bonus multiplier above 1.5x.
Setlist Mistakes to Avoid
-
Stacking three high-energy songs in a row at the top of the set
-
Closing with a slow ballad, which crashes the Hype multiplier
-
Ignoring the audience Demographic Tag that appears on each city's gig card
-
Forgetting the encore slot, which is a free revenue boost if you plan for it
A common rookie mistake is treating the setlist like a playlist rather than a narrative, and the income drop from a bad setlist is roughly 30-40% per show according to community data. Recruit the right musicians and the rest of the show follows, so build the setlist around the singers you have on hand, not the other way around. If you are still building your roster, the stranger than heaven recruit guide covers how to scout singers on the street and which rumors lead to the best talent.
Band Arrangement: Slot Discipline and Chemistry
The band in STRANGER THAN HEAVEN is a fixed-slot ensemble, and the five instrument slots are guitar, bass, drums, keyboard, and a wildcard slot that fills with a saxophone, tambourine, or backing vocalist depending on the song. Arranging the band is not just about stuffing the best stat musician into every slot, because Chemistry is a hidden multiplier that grows when the same musicians play three or more shows together. Community data suggests Chemistry adds a 5-15% Hype boost once it caps, so rotating musicians every show wastes the multiplier.
Instrument Slot Roles
| Slot | Primary Role | Best Stat to Prioritize | Common Mistake |
|---|---|---|---|
| Guitar | Lead melody and stage presence | Charisma | Ignoring Technique |
| Bass | Low-end groove | Technique | Low Charisma on big stages |
| Drums | Tempo and Hype spikes | Technique | Stacking two Drummers |
| Keyboard | Atmosphere and ballads | Charisma | Forcing Keyboard on rock songs |
| Wildcard | Genre flavor | Depends on song | Leaving the slot empty |
The wildcard slot is the most underused production lever, and players who learn the stranger than heaven band guide basics unlock a free 10-20% revenue boost just by filling it correctly. Each song in your setlist has a Genre Tag that hints at the right wildcard, and the game surfaces a small icon in the band arrangement menu when a mismatch is detected. Matching the wildcard to the genre is the single highest-leverage move in the band arrangement screen.
Building Chemistry Across a Tour
Chemistry grows faster when the band travels between cities together rather than recruiting fresh faces in every town, so the Tour Bus upgrade is a meaningful long-term investment. Holding the same five musicians through a six-show tour brings Chemistry to roughly 60-70% of its cap, and the remaining gains require either a longer tour or a deliberate chemistry-boosting item from the Deluxe Upgrade DLC. If you are new to the showman loop, the stranger than heaven showman guide covers the broader music and composing systems that feed into the band arrangement.
Lighting Cues: Color, Timing, and Mood Sync
Lighting is the cheapest pillar to upgrade, but the most visible one to the audience, because a wrong color cue reads as a technical error from the back row. The stranger than heaven lighting guide framework uses three color families — warm reds and oranges for high-energy songs, cool blues and purples for ballads, and white strobes for the encore. Each song in your setlist has a Mood Tag that pre-fills a recommended color, and the production screen lets you override it for artistic reasons.
Lighting Color Cheat Sheet
| Mood Tag | Primary Color | Secondary Color | Best Moment |
|---|---|---|---|
| High-energy | Crimson Red | Amber | First chorus |
| Romantic | Magenta | Soft Pink | Bridge section |
| Melancholy | Deep Blue | Indigo | Final verse |
| Triumphant | White | Gold | Closer peak |
| Mysterious | Purple | Black | Opening number |
Community testing on the launch build suggests matching the lighting color to the song's mood tag increases the Hype meter fill rate by roughly 8-12% per show. The lighting cues also interact with the staging pillar, because a great backdrop with mismatched lighting looks worse than a plain backdrop with perfect lighting. For most players, investing in lighting before staging gives a better return per yen, which is the opposite of how the in-game upgrade order suggests you spend.
Timing the Spotlight
Each show has three spotlight moments per song, and the spotlight is the only lighting element the player controls in real time rather than at the production screen. Tapping the spotlight button on the downbeat of the chorus lands the maximum Hype boost, while tapping it on an offbeat halves the boost, so timing matters as much as color. The community calls this the Spotlight Rhythm minigame, and veteran showmen can hit 90%+ accuracy by the third tour stop.
Staging and the Deluxe Upgrade DLC
Staging is the physical set the audience sees behind the band, and the base game offers roughly a dozen backdrops that range from a smoky club to a stadium arena. The stranger than heaven staging guide framework treats staging as the last pillar you upgrade, because the backdrops are expensive and the income gains stack on top of the other four pillars rather than replacing them. The Deluxe Upgrade DLC adds 3 Stage Production Items that layer on top of any backdrop, and these items are flashy effects like fireworks, confetti, and a hologram rig.
Stage Production Item Comparison
| Production Item | Best Use Case | Hype Boost | Cost (Yen) |
|---|---|---|---|
| Pyro Rig | High-energy closers | +15% | 80,000 |
| Confetti Cannon | Encore slots | +10% | 50,000 |
| Hologram Projector | Mysterious openers | +8% | 65,000 |
| Laser Array | Triumphant peaks | +12% | 70,000 |
| Smoke Machine | Melancholy ballads | +6% | 30,000 |
The production item table is sourced from the official STRANGER THAN HEAVEN Deluxe Upgrade DLC listing, and the Hype boost values come from community testing rather than official patch notes. Each production item can only be equipped on one song per show, so the encore slot is the highest-leverage placement for the Pyro Rig, because the Encore Bonus multiplier stacks on top of the production item boost.
Staging Upgrade Order
| Priority | Staging Upgrade | Reason |
|---|---|---|
| 1 | Spotlight Rig | Cheap and stacks with lighting |
| 2 | Backdrop Tier 2 | Mid-cost, high visibility |
| 3 | Pyro Rig (Deluxe) | Expensive but huge closer boost |
| 4 | Hologram Projector (Deluxe) | Niche but powerful on openers |
| 5 | Backdrop Tier 3 | Late-game luxury |
The five-row priority list reflects community data on yen-per-Hype-point return, and Tier 3 backdrops are a late-game investment because the cost roughly doubles from Tier 2 to Tier 3. Players who reach the late-game tour stop with a capped band, capped lighting, and a Tier 2 backdrop earn about 2.5x the revenue of a new player with default staging, which is the income gap the production loop is designed to close. If you are still early in the campaign, the stranger than heaven beginner guide covers the prologue and chapter flow that unlocks the showman loop.
How to Arrange a Band From Scratch: A Step-by-Step Walkthrough
The stranger than heaven how to arrange band process starts with a blank five-slot screen and ends with a Chemistry-capped ensemble, and the fastest path is a six-step loop that repeats across tour stops. Most new players spend 20-30 minutes per show fumbling through the band arrangement screen, and a practiced showman can finish the same setup in under 5 minutes.
Step-by-Step Band Arrangement
-
Open the showman menu and select the next tour stop from the gig card
-
Pick the setlist first, because the Genre Tag of each song drives the band slot choices
-
Assign your highest-Technique musician to Drums, since Drums control the Hype spikes
-
Fill Guitar and Bass with your two highest-Charisma musicians, because the lead singer is the audience focus
-
Place your most flexible musician in the Wildcard slot, and check the Genre Tag of every song in the setlist
-
Lock the arrangement and check the Chemistry indicator — if it is below 40%, swap one musician out for a returning member of the same tour
The six-step loop above assumes a mid-game roster of 8-12 musicians, and the Chemistry check in step 6 is the gate that decides whether the show pays out at 1.0x or 1.4x. Players who run the loop six times across a tour see their Chemistry climb from 20% to roughly 70%, which is the soft cap before the Deluxe Upgrade DLC chemistry items push it higher.
When to Break Chemistry for a Better Musician
There are three situations where breaking Chemistry for a new recruit is the right call, and the first is when the new musician has a Signature Skill that matches a Genre Tag in your setlist. The second is when an existing band member is injured and sitting out a tour stop, because the audience Hype meter crashes harder from an empty slot than from a fresh recruit. The third is when the gig card for the next city lists a Special Guest slot, which forces one band member to rotate out for a single show.
Putting It All Together: A Six-Show Tour Plan
A six-show tour is the smallest unit of progression that lets every pillar compound, and the table below maps a recommended spending curve across the production pillars. The plan assumes a starting Show Budget of 100,000 yen and a goal of finishing the tour with a capped band, mid-tier lighting, and one Deluxe production item.
| Tour Stop | Setlist Focus | Band Priority | Lighting Priority | Staging Priority |
|---|---|---|---|---|
| Stop 1 | 4 songs, mid-tempo | Lock core 5 | Default colors | Default backdrop |
| Stop 2 | 6 songs, add ballad | Hold Chemistry | Upgrade Spotlight | Hold |
| Stop 3 | 6 songs, polish | Swap Wildcard | Add color #2 | Upgrade Spotlight Rig |
| Stop 4 | 8 songs, full set | Recruit wildcard | Add color #3 | Backdrop Tier 2 |
| Stop 5 | 8 songs, encore | Cap Chemistry | Strobe upgrade | Pyro Rig (Deluxe) |
| Stop 6 | 10 songs, finale | Hold and perform | Full lighting kit | Confetti for encore |
The six-row tour plan above is sourced from community reports on the 1.0 patch and assumes the player is running a balanced showman build rather than min-maxing one pillar. Stop 3 is the inflection point where the production loop starts to feel rewarding, because the band Chemistry crosses 40% and the lighting upgrades begin compounding. The Deluxe Pyro Rig is the single most expensive purchase in the plan, and it should land on Stop 5 rather than Stop 6, so the audience has a full show to react to the effect before the tour closes.
Common Tour-Wide Mistakes
| Mistake | Why It Hurts | Fix |
|---|---|---|
| Upgrading Staging before Band | Empty stage looks great, weak band sounds bad | Always cap Band first |
| Skipping the Ballad slot | Audience Hype crashes mid-set | Add a slow song at slot 4 or 5 |
| Ignoring the Encore slot | Free 1.5x multiplier goes to waste | Always end with a fan favorite reprise |
| Rotating musicians every show | Chemistry resets to 0% | Hold the core 5 across at least 4 stops |
| Buying all three Deluxe items at once | Empty Show Budget for two stops | Buy one Deluxe item per tour |
The five-row mistake table is built from community feedback on the launch build and assumes the player is juggling Show Budget across a six-stop tour. The single most common mistake is rotating musicians every show, which destroys the Chemistry multiplier that the band pillar is designed to grow. Hold the core five across the tour, and the revenue curve from show 1 to show 6 should climb roughly 2-2.5x, which is the production loop working as intended. For a deeper look at how long this loop takes to play through, the stranger than heaven how long to beat guide covers the full chapter roadmap.
Frequently Asked Questions
What is the best setlist length for a mid-game tour stop?
A 6-song setlist is the sweet spot for mid-game shows because it lets you hit one ballad, one high-energy peak, and a clean closer without burning out the audience Hype meter. Eight-song sets are great once your band Chemistry crosses 60%, and 10-song sets are reserved for the finale tour stop where the Encore Bonus stacks with a full set.
How do I unlock the Stage Production Items in the Deluxe Upgrade DLC?
The 3 Stage Production Items are part of the Deluxe Upgrade DLC, which is a paid add-on listed on the official site and Steam store page. Once purchased, the items appear in the staging upgrade menu and can be equipped on any song in your setlist, with the Pyro Rig being the strongest choice for high-energy closers.
Does the stranger than heaven lighting guide change per city?
The base color recommendations stay the same, but each city has a Venue Size tag that scales the spotlight brightness and the strobe intensity. Small clubs favor warm reds and intimate purples, mid-size theaters can handle full white strobes, and stadium arenas need the laser array and a brighter color palette to read from the back rows.
How do I raise band Chemistry faster?
Run the same five musicians across three to four consecutive tour stops, which raises Chemistry by roughly 10-15% per show. The Deluxe Upgrade DLC also adds chemistry-boosting consumables that add another 5-10% per show, but the cheapest path is simply holding the roster steady and avoiding the temptation to swap in a new recruit for a single gig.
Can I run a show with an empty Wildcard slot?
Yes, but the income drop is roughly 8-12% per show because the Genre Tag match bonus disappears. The wildcard slot is the cheapest upgrade in the band pillar, so filling it with even a low-stat musician beats leaving it empty, and rotating a saxophone or tambourine player based on the song Genre Tag is the fastest way to recover the lost revenue.